If you're starting your video editing journey, the sheer number of software options can be overwhelming. Adobe Premiere Pro, Final Cut Pro, CapCut… the list goes on. You might think professional-grade results require expensive subscriptions or a steep learning curve.
What if I told you that the software used to edit and color grade Hollywood blockbusters like Dune and The Martian is completely free? That software is DaVinci Resolve.
This guide is designed to cut through the noise. I'll show you why DaVinci Resolve is arguably the only video editor a beginner needs, and I’ll walk you, step-by-step, through completing your first edit today. Let's build your video editing stack on the most powerful foundation available.
Why DaVinci Resolve is the Ultimate Beginner's Choice
Choosing your first editing software is a major decision. Here’s why Resolve wins for newcomers and pros alike:
1. Truly Free, Without Limits: Unlike Adobe's subscription model or Final Cut's one-time purchase, the core version of DaVinci Resolve—DaVinci Resolve 18—is free. You get 95% of the features, including the revolutionary Cut page, the full Fusion visual effects suite, and the industry-standard color grading tools. There are no watermarks, no time limits, and no export restrictions.
A Note on Different Paths: DaVinci Resolve is the undisputed champion for those who want to dive deep into professional-grade editing for free. However, if your primary goal is to make quick, great-looking videos with minimal learning curve—prioritizing intuitive drag-and-drop effects and direct YouTube uploads over Hollywood-level color grading—you might find a streamlined tool like Moviecut 2025 more aligned with your “get it done” needs. It represents a different, simplicity-focused approach to video editing.
2. All-in-One Studio: Other editors often require jumping between different programs for effects, audio, or color. Resolve combines seven professional modules in one: Media, Cut, Edit, Fusion (VFX), Color, Fairlight (Audio), and Deliver. You learn one ecosystem, not five different apps.
3. Future-Proof Your Skills: By learning Resolve, you're learning the tool that dominates professional color grading and is rapidly gaining ground in cutting rooms worldwide. The skills you build today are the skills that command high rates in the industry tomorrow.
Your First Project: A 7-Step Walkthrough
Follow these steps to go from zero to a completed, exported video.
Step 1: Download, Install, and First Launch
Head to the [Blackmagic Design website](https://www.blackmagicdesign.com/products/davinciresolve) to download the free version. Install it, launch the app, and create a new project. I recommend naming it clearly, like “`My_First_Edit_2024`”.
Pro Tip: Upon launching, you’ll see the Project Manager. This is your hub for all future projects. Keep it organized from day one.
Step 2: Import & Organize Your Media
Click the "Media" tab at the bottom. Navigate to your video clips, images, and audio files. You can drag and drop them directly into the "Media Pool" panel. Create Bins (Resolve's term for folders) to organize your footage—for example, "A-Roll," "B-Roll," and "Music."
Resource Tip: Need high-quality B-roll or music to practice with? Stock libraries like Artgrid or Storyblocks offer vast, royalty-free collections perfect for personal projects.
Step 3: The "Cut" Page – Assemble Your Story Quickly
This is Resolve's secret weapon for beginners. Click the "Cut" tab. Your media pool is on the left, a preview player on top, and a timeline at the bottom.
Drag your primary video clip to the timeline.
Use the "Source Tape" view to scrub through your other clips and press 'F' to add in and out points. Press 'E' to append the selected clip to the end of your timeline.
The "Cut" page makes rough assembly intuitive and fast, hiding more complex controls.
Step 4: The "Edit" Page – Fine-Tune and Add Transitions
For more detailed work, move to the "Edit" page (the film strip icon). This is a traditional, powerful editing timeline.
Trim Clips: Hover over the edge of a clip in the timeline until the cursor changes, then click and drag to shorten or lengthen it.
Add Transitions: Go to the "Effects Library" (top left), open "Video Transitions," and drag a cross dissolve between two clips.
Add Titles: In the same Effects Library, find "Titles." Drag a basic text title onto your timeline above your video.
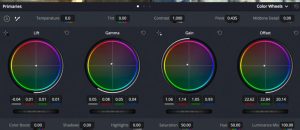
Step 5: A Touch of "Color" – Make Your Footage Pop
Click the "Color" page. Don't be intimidated! Even one click can transform your video.
In the bottom panel, find the "Color Wheels." Try gently pulling the Midtone wheel towards orange and the Highlight wheel towards blue for a warm, cinematic look.
Apply a preset: On the left, open the "LUTs" browser (Look-Up Tables). Navigate to "Film Looks" and drag one you like onto a clip. Lower the intensity if it's too strong.
Gear for Growth: If you fall in love with color grading (you will), the DaVinci Resolve Speed Editor keyboard is a game-changer for workflow efficiency. Its tactile jog wheel makes cutting and reviewing footage incredibly fluid.
Step 6: Fix Your Audio in the "Fairlight" Page
Click the "Fairlight" page. Your timeline audio tracks are now front and center.
Select an audio clip. On the left, open the "Inspector" panel (or press `Cmd+6` / `Ctrl+6`).
Under "Volume," you can adjust the level. Aim for your dialogue to peak around -12 dB.
To reduce background noise, right-click on the audio clip, select "Fairlight FX," and add the "Voice Isolation" effect.
Step 7: "Deliver" Your Final Video
You're ready! Click the "Deliver" page.
1. Under "Render Settings," choose "QuickTime" or "MP4" for web use.
2. Under "Codec," select "H.264" or the newer "H.265."
3. Choose a location and filename.
4. Click "Add to Render Queue," then "Render All."
Congratulations! You've just completed a full edit in a professional studio application.
Where to Go From Here: Your Learning Path
1. Master the Edit Page: Learn keyboard shortcuts (`I` for In point, `O` for Out point, `Ctrl+B` / `Cmd+B` to blade a clip). They are your biggest speed boost.
2. Dive into Color Grading: Start with primary corrections (exposure, contrast, white balance) before moving to secondary grading (adjusting specific colors or objects).
3. Explore Fusion: Begin with simple text animations and lower-third graphics. The node-based workflow is powerful but has a learning curve—tackle it one project at a time.
4. Deepen Your Audio Skills: Learn to use compression and EQ in Fairlight to make your voiceovers sound crisp and professional.
Accelerate Your Learning: For a structured path from beginner to confident user, I highly recommend the "DaVinci Resolve 18 - Beginner to Advanced" course on Udemy. It’s an affordable way to get comprehensive, project-based training.
Final Thoughts
DaVinci Resolve isn't just a tool; it's an investment in your creative future. It removes the financial barrier to entry and offers a growth path that has no ceiling. By starting with it, you’re not just learning to edit—you’re learning the craft at the highest level.
Your Action for Today: Download DaVinci Resolve, follow this guide to create a 60-second video using your phone clips, and share your experience in the comments below. What was the biggest "aha!" moment?
What would you like me to break down next? Let me know in the comments if you want a deep dive into beginner color grading or mastering the Fusion page for simple VFX.
Disclosure: We may earn a commission if you choose to purchase a license through our link, at no extra cost to you. This supports our work in providing detailed, unbiased software reviews.